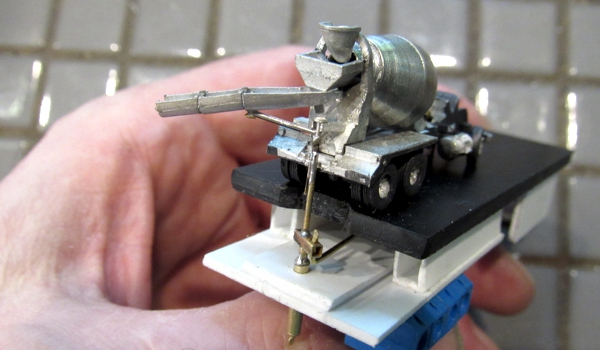
Cement Truck
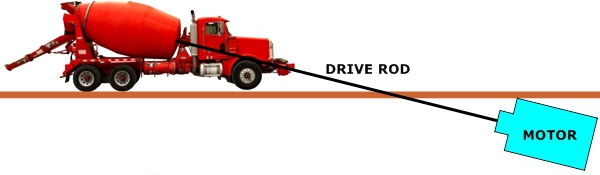
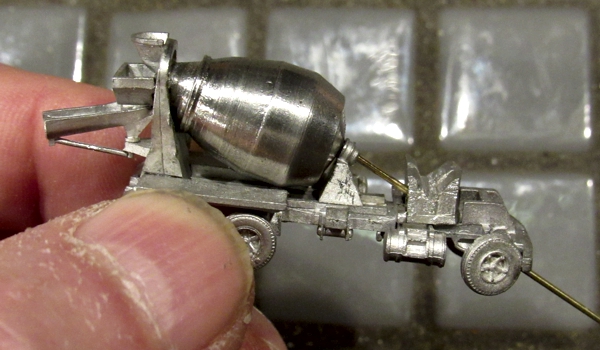
This one went from an idea to a project as I developed the Men at Work diorama. Conceptually it's quite simple: the drum is driven directly by a rod running down through the cab and below ground to a low-RPM motor.
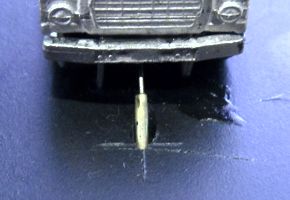
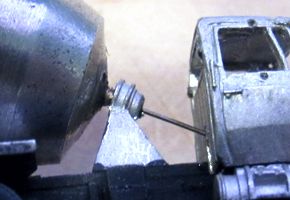
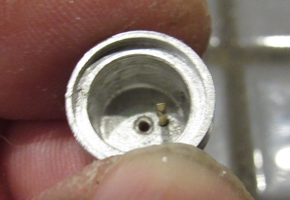
The execution, however, wasn't as straightforward as that. If I'd run the drive rod straight from the drum, the rod would exit the middle of the truck's radiator grille. So the drum is free to rotate on its own, and is driven via an L shape at the end of the rod, which engages a pin inside the drum (below left); this allows the rod to be at a slightly different angle than the drum. A pin on the inside of the discharge chute (below right) keeps the open end of the drum in place.

Then there was the drum itself: it was never meant to rotate, so it's not perfectly round. Ideally I would have made a new one on my lathe, but my lathe is out of commission, so I'd just have to do with the kit drum, warts and all.
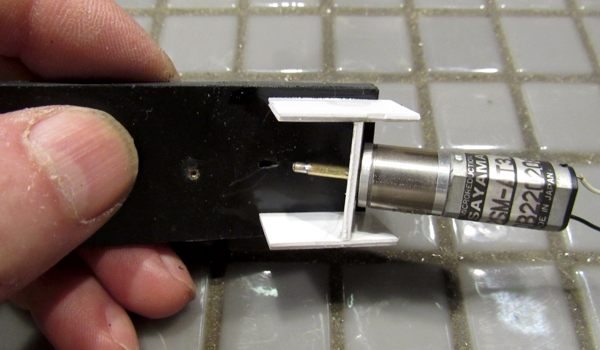
The brass drive rod from the drum (above) descends though the cab to to the low-RPM motor under the base place (below).
Bonus Animation
It was not planned; I had in fact glued the discharge chute in place. But while mounting the truck to the base plate, I knocked the chute. I thought I'd broken it; instead, it simply snapped free, and started functioning just like the real one. So, I motorized it. The mechanism is a simple crank; a piece of 0.006" phosphor-bronze wire hooks onto the end of the chute to swing it side to side. It's manually activated by a pushbutton.
|
|
Illumination
While I was at it, I installed four-way flashers using two red and two amber pre-wired 0402 SMD LEDs. Oh, and just for giggles, I installed a green LED in the truck dashboard. You can't see it directly, but the glow lights up the cab.
Drum Drive Improvement
My "clever" drum drive wasn't so clever: after a time, the drum started to get herky-jerky. So, I modified the drive. Where the rod entered the drum, I installed a short length of brass tubing of the same diameter (this would serve as the lower bearing); then I soldered a length of spring steel wire into the brass tubing (below left). Next, I replaced the rod at the motor end with another piece of tubing, slipped it over the spring steel wire, crimped it and glued it with CA (below right). The wire does exactly what it's supposed to: transfer rotation from one axis to another slightly different axis. And now the drum spins smoothly.